


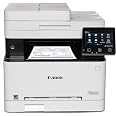
CanonColor imageCLASS MF656Cdw - Wireless Duplex Laser Printer, All-in-One with Copier, Scanner, Fax, Auto Document Feeder, Mobile Ready, 3 Year Limited Warranty, 22 PPM, White
Details
- BrandCanon
- Connectivity TechnologyWi-Fi Wi-Fi
- Printing TechnologyLaser
- Special FeatureAuto-Duplex
- ColorWhite
- Model NameMF656Cdw (New
Description
🚀 Elevate Your Office Game with Canon's All-in-One Powerhouse!
- SEAMLESS CONNECTIVITY - Print from anywhere with Wi-Fi and mobile compatibility.
- HIGH SPEED PERFORMANCE - Experience rapid printing at 22 pages per minute, both in color and black & white.
- PEACE OF MIND WARRANTY - Enjoy a 3-year limited warranty for worry-free operation.
- ECO FRIENDLY EFFICIENCY - ENERGY STAR certified to save energy and reduce costs.
- ALL IN ONE FUNCTIONALITY - Print, scan, copy, and fax with one powerful device.
The Canon Color imageCLASS MF656Cdw is a versatile wireless duplex laser printer that combines printing, scanning, copying, and faxing capabilities. With a print speed of up to 22 pages per minute and a robust 250-sheet capacity, it’s designed for efficiency and productivity. This ENERGY STAR certified device also features mobile printing options and a 3-year limited warranty, making it a reliable choice for any modern office.


Specifications
| Maximum print Resolution Color | 1200 x 1200 dpi Dots Per Inch |
| Wattage | 5.7E+2 |
| Is Electric | Yes |
| Maximum Copy Resolution Black and White | 1200 x 1200 dpi |
| Maximum Copy Resolution Color | 1200 x 1200 dpi |
| Ink Color | Color |
| Additional Printer Functions | All In One |
| Warranty Type | Limited |
| Maximum Copies Per Run | 999 |
| Processor Count | 1 |
| Control Method | Touch |
| Controller Type | Android |
| Print media | Paper (plain) |
| Scanner Type | Sheetfed |
| Maximum Copy Speed Black and White | 22 ppm |
| Display Type | LCD |
| Compatible Devices | Smartphones |
| Printer Type | Laser |
| Additional Features | Auto-Duplex, Network-Ready, Energy Star, Epeat Qualified, Display Screen, Auto Document Feeder, Touch Screen, Double Sided Scanning |
| Printer Output Type | Color |
| Item Weight | 48.5 Pounds |
| Item Dimensions D x W x H | 18.2"D x 17.8"W x 16.3"H |
| Paper Size | 3 x 5, 8.5 x 14 Inches |
| Maximum Sheet Capacity | 250 |
| Media Size Maximum | 8.5 x 14 inch |
| B&W Pages per Minute | 22 |
| Initial Page Print Time | 10.3 seconds |
| Color Pages per Minute | 22 ppm |
| Total USB 2.0 Ports | 1 |
| Total Usb Ports | 1 |
| Hardware Connectivity | USB, Ethernet |
| Connectivity Technology | Wi-Fi 802.11b/g/n, Wi-Fi Direct Connection |
| Duplex | Automatic |
| Dual-sided printing | Yes |
| Color | White |
Have a Question? See What Others Asked
Reviews
D**L
GOOD BY FOR A GREAT PRICE.
I had a Cannon MF644cdw for a few years and it worked great. This one is just the newer version. My mf644cdw started putting black streaks on the prints and then just started running the paper through without no printing at all. Toner was good and new just no printing. Then started making a funny noise. While looking up trouble shooting tips online i came across this newer version. Well being a Tech junkie and my wife not so much, Ummmm, well the old printer became unrepairable and honey we need a new printer. Print quality has been great on both the 644 and 656 but I will have to say a bit better on this 656. time from sleep to print has greatly improved as well. I will also say that this printer has the cheapest toner cartridges to replace of most all color laser printers. I work from home so it does get alot of use. Document feeder work great and to tell the truth I dont remember ever having a paper jam from either printer on the feeder or printer. Cant say much about the fax feature as I have never used it on either printer. Setup is very easy right out of the box. Just plugged it in went through a few setup questions on the display and bam it was hooked to my wifi and up and running as network printer. Scan to email can be a bit tedious to set up but I got the below instructions from another reviewer and worked perfectly.So Hopefully this will help someone (wish I would have found earlier). This type of information should have been in the manual in some way. I found this in the Canon community discussion. Note that this setup is configured for using a gmail email address to configure- so you need a gmail for this to work correctly (otherwise a few steps will need changed like the SMTP server and port number...)1- If you are using GMail, you have to setup an 'App Password' for your Canon to work.2- Go to Google.com and click on your picture (upper right hand corner) and select 'Manage Your Google Account'.3- Click on 'Security on the left hand side'.4- Scroll down to section that says 'Signing in to Google'.5- Make sure '2-Step Verification' is setup. If it is not, add 2-step verification now.6- Click on 'App Passwords' to setup a password for your Canon. You may have to sign into your Google account again.7- Under the 'Select App' down arrow, select 'Other (custom)'8- Enter a name for your Cannon. I put my model number in the field: MF644Cdw9- Select the 'Generate' button. This will generate a password. Copy/Paste this password or write it down.10- Find your Cannon's IP Address. I selected 'Status Monitor' on my Cannon; then selected 'Network Information'; then selected 'IPv4'; take down the numbers listed under 'IP Address'.11- Open up Chrome and enter the IP Address from step 10.12- Select 'System Manager Mode' option and select 'Log In'. If you have setup a 'System Manager ID' and 'System Manager PIN', enter that information and then select 'Log In'.13- Select 'Settings/Registration' button on the right hand side.14- Select 'TX Settings' on the left hand side.15- Select 'E-mail/I-Fax Settings'.16- Select 'Edit' button on the upper right hand side.17- SMTP server = smtp.gmail.com18- Email Address = [enter your email address]19- Check mark 'Use SMTP Authentication (SMTP AUTH)'20- User Name = [enter your email address]21- Check mark 'Set/Change Password'22- Password = [enter the password generated from step 9 above]23- Check mark 'Use TLS for SMTP'24- Check mark 'Verify Certificate'25- Check mark 'Add CN to Verification Items'26- Check mark 'Use TLS for POP'27- Check mark 'Verify Certificate'28- Check mark 'Add CN to Verification Items'29- Scroll up to the top of the page and select the 'OK' button to save these settings.30- Select 'Network Settings' on left hand side.31- Select 'Port Number Settings'32- Select 'Edit' button in upper right hand side.33- Change 'SMTP' field to = 46534- Scroll up to the top of the page and select the 'OK' button to save these settings.35- Select 'To Portal' link in the upper right hand corner.36- Select 'Address Book' button on right hand side.37- Click on '01' link and select 'Edit' button. Add your email as the first email address.(Later go back and add what other email addresses you may like to scan to in the future)38- Scroll up to the top of the page and select the 'OK' button to save these settings.39- Go to your Cannon and test the Scan to Email function.40- Check email to see if you received the email. If you didn't get email, check 'Status Monitor/Cancel' button under the 'TX Job Log' section for Error Code specifics.
M**.
Good purchase
We are liking this printer a lot.We needed to replace our old Canon B/W laser printer that lasted 12 years, until one of the hinges on the top platen cover broke. 12 years seemed pretty good to me, so I looked only for Canon printers, and we decided to go with color this time. We chose the MF656 over the MF652 because of the auto document feeder.It arrived one day before the promised delivery date. Packaging was excellent, and the instructions for unpacking were easy to follow and fast to execute. It is heavy, I would guess over 40 pounds in its package and maybe 30 pounds unpackaged. While heavier than our old Canon laser, it fit in the same footprint.Plugged it in, turned it on, and it went into an (I guess) initialization mode, whereby the motor was running inside for maybe 4 or five minutes. In the meantime I followed the instructions on the LCD display screen, and by the time the initialization was done, the printer was set up and working. During setup it does ask for an administrator name and password, but I entered no login name and just a 4 digit pin of my choosing and that satisfied it. From opening the box to working printer -- maybe 10 minutes.I use Windows and I would recommend going to the Canon USA website, support area, and look for Scan Utilities to download. It allows for easy scanning and will enable monitoring toner levels and such. I believe there are apps you can get through your phone or tablet for printing from them and monitoring the printer as well.I would recommend this printer or the MF652 (if you do not need the document feeder).
S**T
Amazing Printer But Make Sure to Follow The Correct Steps
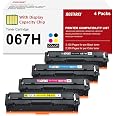
The printer works great! I love the scanning and printing quality. It also comes with 4 toners already installed which is nice. The packaging was also phenomenal with lots of tape on the actual printer to make sure none of the parts moved/opened. Make sure you align the paper correctly in the auto feeder or else it'll destroy the paper you insert and ruin the scan.How to setup correctly:1. Follow the initial setup instructions on the digital display2. Make sure to connect to the same Wi-Fi that your laptop is on3. Download the drivers from the canon website by typing in the name of this exact printer4. Find your printer and download the driers to it5. Now that you've downloaded the drivers, you can download the toner capacity software or scanning software6. You can also download the Canon PRINT software
Common Questions
Trustpilot
1 week ago
2 weeks ago
